
How to Replace Door Handles
Door handles are an essential part of the decor of your home. A new handle can transform your home's decor and bring your decor up-to-date.
As time passes, your doors' knobs can start to feel stiff or even break. These are indicators that it's time to replace the knobs. This guide will help choose the correct door handle replacement for your home.
Door Knobs
The handles on your doors will enhance the appearance of your home and make it easier to shut and open them. They are available in a variety of finishes, colors, and styles to complement your decor. If yours is beginning to appear worn or just need an upgrade, replacing them is relatively simple and can be done in a couple of steps.
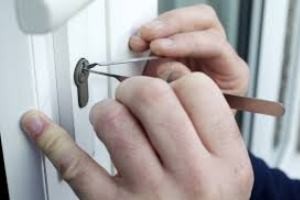
The first thing to find is the shaft or spindle through which the knob is attached to the door. Some knobs have a tiny opening that you can access with a screwdriver to remove the set screws that secure the handle. Some have a slot or hole in which you can use the flathead screwdriver on a spring-activated pin called a detent. The pin opens the latch mechanism, and lets you to pull or push the knob.
Once you have the spindle or shaft, in your hand, remove the old knob and replace it. Be sure to align it correctly and check to ensure that the latch works properly before tightening the new set screws.
After replacing the knob, put the rod for latching over the hole in the door and then lock it using the rod mechanism on the second knob. Ensure that the holes are in alignment, then tighten the screws on the latch plate.
Some people opt for the smooth or brushed finish on their door hardware to give it an elegant, modern look that matches other furnishings in their homes. Others prefer a more rustic design that is a good match for farmhouse-styled spaces. If you have family members with mobility limitations You might be interested in a rim lock or lever knobs for doors, which require less pressure to operate.
While aesthetics have traditionally been the most important factor in door handle design, other factors are increasingly being considered too. Accessibility and control of infections have been major considerations when it comes to developing new handle designs. For instance, some can be operated with the arm of a person.
Latch
The latch that keeps your door handle open is prone to wear and tear due to the wear and tear of use. Changing out the old latch to make room for a new handle can be an easy DIY task and it will make a huge difference in the way your door opens and closes.
Depending on the type of knob you have depending on the type of handle you have, the latch may be a part of the knob itself or it might be an independent piece that is attached to the door itself. In any case, you'll follow the same steps for removing and replacing. It's easy to remove the old latch, particularly in the case of a door handle with a "magic" button. This tiny pressure-slot, found on the side knob is what you need to press in order to remove the latch of the handle.
If your handle does not have this button, the first step is to take off any cover plates that sit over the latch plate. They are typically rectangular or circular and can be removed using the aid of a screwdriver. Some have a slot in which you can put your screwdriver, while others just snap off.
The next step is to loosen the two machine screws that secure the latch and the plate to the door handle. It is important to keep these screws with an angled tip in a secure location to be able to reuse them later. After the screws have been removed, you are able to remove the latch plate and the mechanism from the hole, and then set it aside.
Now you can start on the new latch. Place the inside of the latch into the hole in the door, and secure it using the provided hardware. Make sure the square pin on the inside of the latch is facing the latching mechanism inside the handle and that it is lined up with the other screw chambers in the door handle. Then fix the exterior latch plate using the screws supplied.
Strike Plate
It is not uncommon to replace a door handle because it is loose or does not lock properly. This is often caused by incorrectly aligned parts in the latching mechanism, such as the strike plate being too short or moved upwards or downwards on the doorjamb over time. This project lets you replace your old strikeplate with a more substantial one, which can provide greater security for your door and ensure it stays closed.
Apply a lipstick or other marking material on the bolt for the latch to check if it is the strike plate. Close the door and try to latch it. If the mark is below your strike plate hole, it indicates that the plate is too small and the door will not latch. If the mark is over the strike hole on the plate, it's likely that the strike plate has been moved up or down the doorjamb.
Depending on the door, you may be able to attach the new strike plate in the existing one with the screws that come with it. However, you might need to drill holes prior to drilling and then chisel out some of the wood to make sure it's snugly fitted. If this is the case, you must be careful not to cut too hard or you'll damage the strength of your doorjamb.
Installing a new style box strike plate will give the lock a stronger grip on the doors and require more force to open the doors. It usually requires two longer screws to anchor the strike plate to the frame of the door. To do this, you'll need to take off the existing strike plate and then drill and chisel the wood to make space for the new one.
This hard-to-find strike plate is specifically designed to work with antique rim locks, and it's constructed of robust solid brass with a heavy duty thickness. It comes with wood screws and machine screws, which means you'll have the correct hardware for your job. Just remember that door handles have a pointy tip, whereas the machine screws are more blunt.